 |
| Finished Tee Shirt |
A Special thanks to “moliche” on Ravelry for lighting a fire under me to get this tutorial written.
The original idea for this tee shirt came from SAORI in one of their SAORI Reports about a year ago. I saw several different takes on this technique including this awesome skirt by my friend Kimie.

A few people have asked for additional information on how I made the Tee shirt. So, this post may not be of as much interest as others, but if you are a weaver you may find this technique of interest. I wove this on a SAORI loom, but I'm certain you could work this technique on any loom.
First, as a bit of explanation, the fabric of the tee shirt, (or in Kimie's case, the skirt), becomes part of the weft of the weaving. You cut tabs, or fringe, in the fabric and then weave those tabs as part of the weft SAKIORI style.
Tee shirt Tutorial
This technique can be used for things other than Tee shirts!

1.
I started with a concept. It had been rolling around in my head for
months. As I was pulling the treads for
the warp, I sat down and sketched out my idea.
The finished garment was not exactly like the concept drawing, but
close. Notice that my drawing is not “perfect”…I
cannot draw. The important thing here was that I had a visual on paper of what I had been seeing in my head.

2. The Warp was about 2.5 inches in the reed. All cottons. If you use wool, and you wash it and the wool shrinks/felts you will get a different effect. Not better or worse. Just different. Also, it does not have to be 2.5 inches. You could take a tee that is too small and put in a wider band, thus enlarging it a bit. This technique could also be used to add a “peplum” to a shirt, or, as Kimie did, make a waste band for a skirt.

3.
I marked on the tee-shirt the line I wanted to
cut. A diagonal from right hip to left shoulder. Then cut that line. NOTE:
I nearly started to cut with the rotary cutter – that would have cut
BOTH layers of the shirt. I obviously had
already had my coffee, as I stopped and grabbed the scissors BEFORE I did that!
Lol

4.
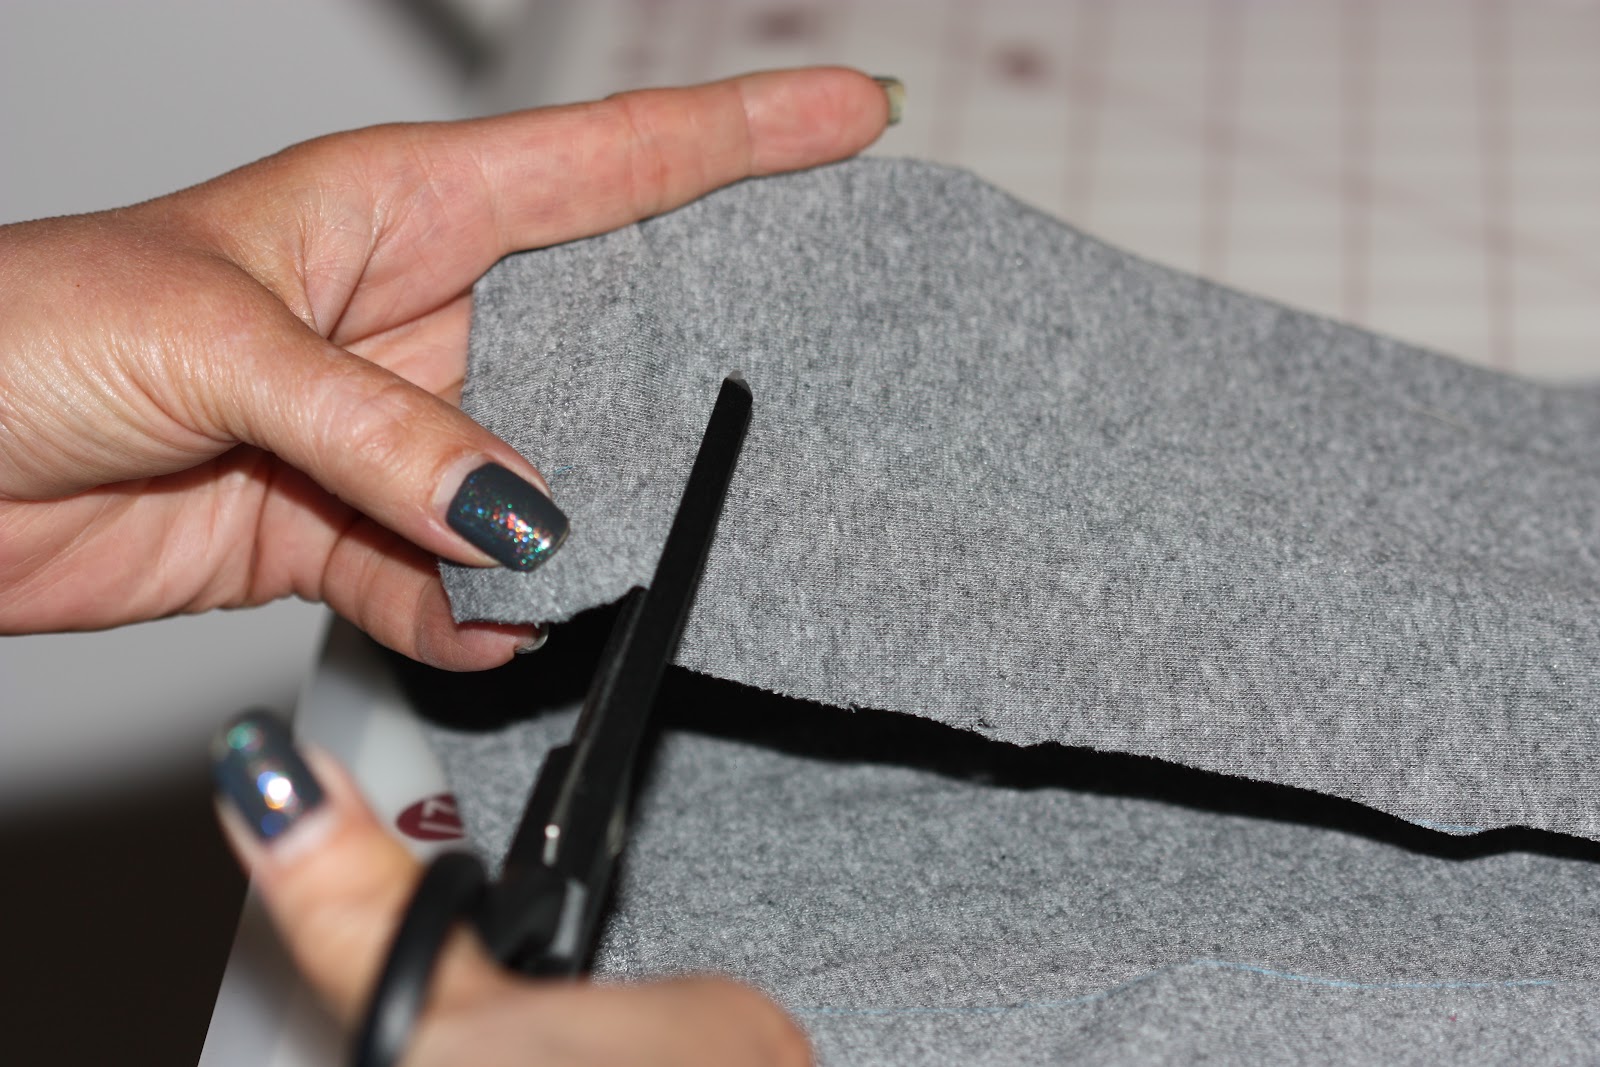
After cutting the long cut, then you need to cut
the “tabs” or the “fringe.” If you are
using a tee shirt knit, these tabs will stretch! So, either cut just shorter
than the width of your warp or the ends will form a little fringe.


5.
I wove close to a yard before starting with the
tee-shirt. But I wanted to pull the warp
to create the gather around the bottom edge.
Decide how much you want to weave before adding in the shirt.
6.
The weaving style is here will be similar to SAKIORI-Japanese
Rag Weaving. You will have both a tab of
tee shirt AND a pass of thread in the same shed. The spacing between the tee shirt tabs is up to
you. The closer together the more
gathers, the further apart the smoother – but also the possibility of little
holes.


7.
Continue up your shirt, weaving in the tabs. Important to note here: ONE side of you shirt is woven into the
piece. It seems obvious once you've worked with this technique, but some folks have asked. I apologize. I do not have a photo. Guess I will just have to do this again so that I can add a pic here! lol
8.
At the top, once again you need to decide how
much extra you want to weave. You could
stop close to where the tee shirt tabs end, or do a longer piece to create a
scarf, or ruffle.
9.
Now you are done weaving! Take it off your loom and knot your ends.
10.
You now have a woven strip going up one side of
the initial cut, and a straight (ie un tabbed) cut on the other side. Line up the woven strip and the cut edge of
the tee-shirt with the shirt on the bottom (well, unless you want it on top)
and stitch the length. I actually
stitched twice. I also stitched the woven
side – may not have been necessary, but I did it.

There are MANY possibilities with this technique. I would love to hear from anyone who tries this. Attach Photos and I'll do a follow up at some point featuring YOUR work.
Happy Weaving.
No comments:
Post a Comment
Thank you for your comment.